First article in the series.
********ADD LINK IN BETWEEN DOUBLE QUOTES IN LINE BELOW******** Previous article in the series.
In Parts 1 and 2, we created a Fill Pattern to define a grid pattern for an acoustic tile Ceiling, and then set up a Material that uses that Fill Pattern as a Surface Pattern. We will now assign that Material to the finish layer of a Compound Ceiling type.
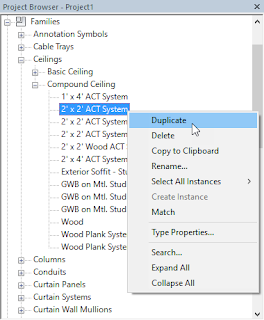
- In the Project Browser, expand the Families node.
- Under the Families node, expand the Ceilings node. Then expand the Compound Ceiling node under that.
- Right click on the 2’ x 2’ ACT Compound Ceiling family type. Choose Duplicate from the context menu. If your project file does not have that type, choose another type used to show a grid-based acoustic tile ceiling.
- Give the duplicated type a meaningful name. I chose to call the example type 4-24x24_1-48×6 ACT System.
- Open a Ceiling Plan view that has an area to receive the new Ceiling Type. If the area does not already have a Ceiling, place one….


