Lets create a Checkbox schedule in Revit
When we have a checkbox (yes/no) parameter in a schedule, Revit defaults to display text (ie checked = “Yes”, unchecked = “No”)
Some people prefer showing this graphically as a “check box”, this blog post will show you how to get it done.
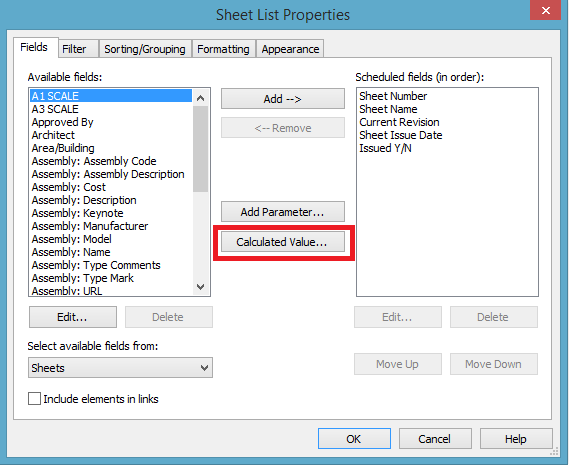
In this example, we want to add an “Issued” field to a Sheet List schedule that can graphically be shown as checked or unchecked. We have created an “Issued Y/N” parameter and added it to all Sheets, and included it on the Sheet List Schedule. This currently shows up as a text field (See image above).
To make it a graphical “check box”, we first need to add a Calculated Value to the Scheduled Fields list. In the Schedule properties, click on Calculated Value.

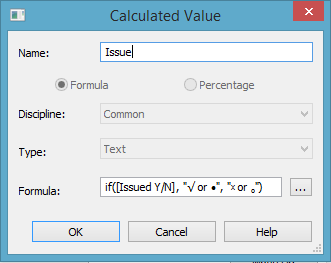
Give it a name, and for this example we are going to add a simple “if statement” formula where
IF ([Issued Y/N], “√”, “ᵡ”)
Which basically means, if the parameter [Issued Y/N] is checked, then show a √, if not show a ᵡ.

How we get the…


Leave a Comment
You must be logged in to post a comment.