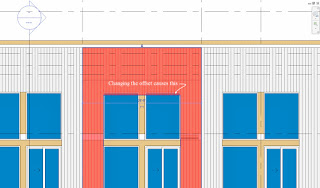
In this example I’ve got a veneer wall and I used the Edit Profile feature to alter its shape. I wanted it to go from the bottom of the building to the top but provide the overall opening it requires in the middle. As luck would have it the overall height has changed a little. The selected wall in the following image is one of several veneer wall segments. It needs to drop down by 6 inches.
All I need to do is edit the Top Offset parameter, changing it from 3′-6″ to 3′-0″. That was easy.
Unfortunately when I do that easy bit I notice the opening I created using Edit Profile has shifted down by the same 6 inches.
At this point I’d use Edit Profile and move that sketch segment back up to the proper location. Since I have several of these veneer walls to adjust; for one of them I accidentally used Edit Profile first. I decided to change the Top Offset parameter while I was there, noting…


