In this Autodesk Revit tutorial I am going to show you how to use the Text tool. If you’d like to watch a video version of this tutorial first, simply click in the box below…
[youtube https://www.youtube.com/watch?v=yusTuvPR-tc?feature=oembed&w=720&h=405]
At some point in the production of your construction documentation you are going to need to add some text to your views. You will use the Text tool to do so. Switch to the “Annotate” menu (1) and then choose “Text” (2)….
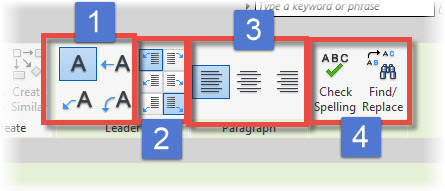
The ribbon menu instantly changes to give you all the tools you need to create your paragraph text element…
The default setting is to create a text block without a leader (1). However you can change this to include a straight, cranked or curved leader at the time of creation. You can justify where the leader is positioned in relation to the text using one of the toggles on the “Leader” panel (2). You can justify the text itself, within the text element (3). You can also run a “Spell Checker” on…


